
Table of Contents
In this post I'd like to explain the "how"-s and "why"-s of moving from forge-based static site hosting to a full on VPS.
This isn't really a tutorial, mostly because there are far better texts out there how one would do these things, but I do link to many of them and point out stuff I found confusing or surprising.
Also, if you're reading this post, you're reading it served by the VPS, say hi!
1. Background
I've been blogging for almost eight years now and for those eight years, I've always relied on some sort of free host for my content. This seemed fine for a pretty long time, especially considering neither this nor my other site is monetized at all. However, recent-ish changes in my needs and financial situation finally got me to break with the status quo and actually experiment a little.
Originally, I relied on Github Pages, which was for a site like mine
almost perfect. It was free and required nearly zero setup, it built
almost immediately, it had impeccable uptime (something Github
famously started to struggle with), and I could super easily place a
cheap domain in front of it to make it a little more appealing than
the factory-default nemin32.github.io address.
However, due to the, ehm, recent trends and emboldened by the rallying cries of the people who had enough, I too took the dive and moved my presence over to Codeberg. This, of course, meant my two websites had to move too. Thankfully the process wasn't particularly painful (the article linked above pretty much gets you up to speed in 10-15 minutes) and so I quickly had everything set up.
While I thought I was done, sadly I quickly realized that though the two services were similar in design, their quality of service was very different. Codeberg Pages really struggled at times. My pages are rarely over a couple hundred kilobytes (most of which being a couple AVIF-encoded pictures) and yet there were times where loading my sites took 10-15 seconds, while the browser just hanged.
Before anyone gets the wrong idea, I'm not blaming Codeberg for this in any shape or form. In fact I'm very grateful, that the option exists in the first place. After all, they are a (relatively) small non-profit, who have to serve not just my silly little webpages, but sites for far more serious projects too. With this in mind, it's no wonder they can't always afford the computing power for me.
However, as much as they have my sympathies, I was still stuck with this problem and had to figure out some solution. And said solution was joining something useful with something pleasant: Enter VPS-es.
2. Picking my provider
A VPS is a managed virtual machine, that one may rent from cloud provider companies. The userbase is very wide, you can find people using them from all areas of life, from students and hobbyists, to very serious and large companies, who don't want to bother with on-prem solutions.
These days, if one happens to fall into the former category and only really needs a machine that has some minimal RAM and a reasonably fast few (perhaps even one) core CPU, they have a plethora of providers to pick from, who specialize in pushing down prices and lending you such VMs for literal peanuts.
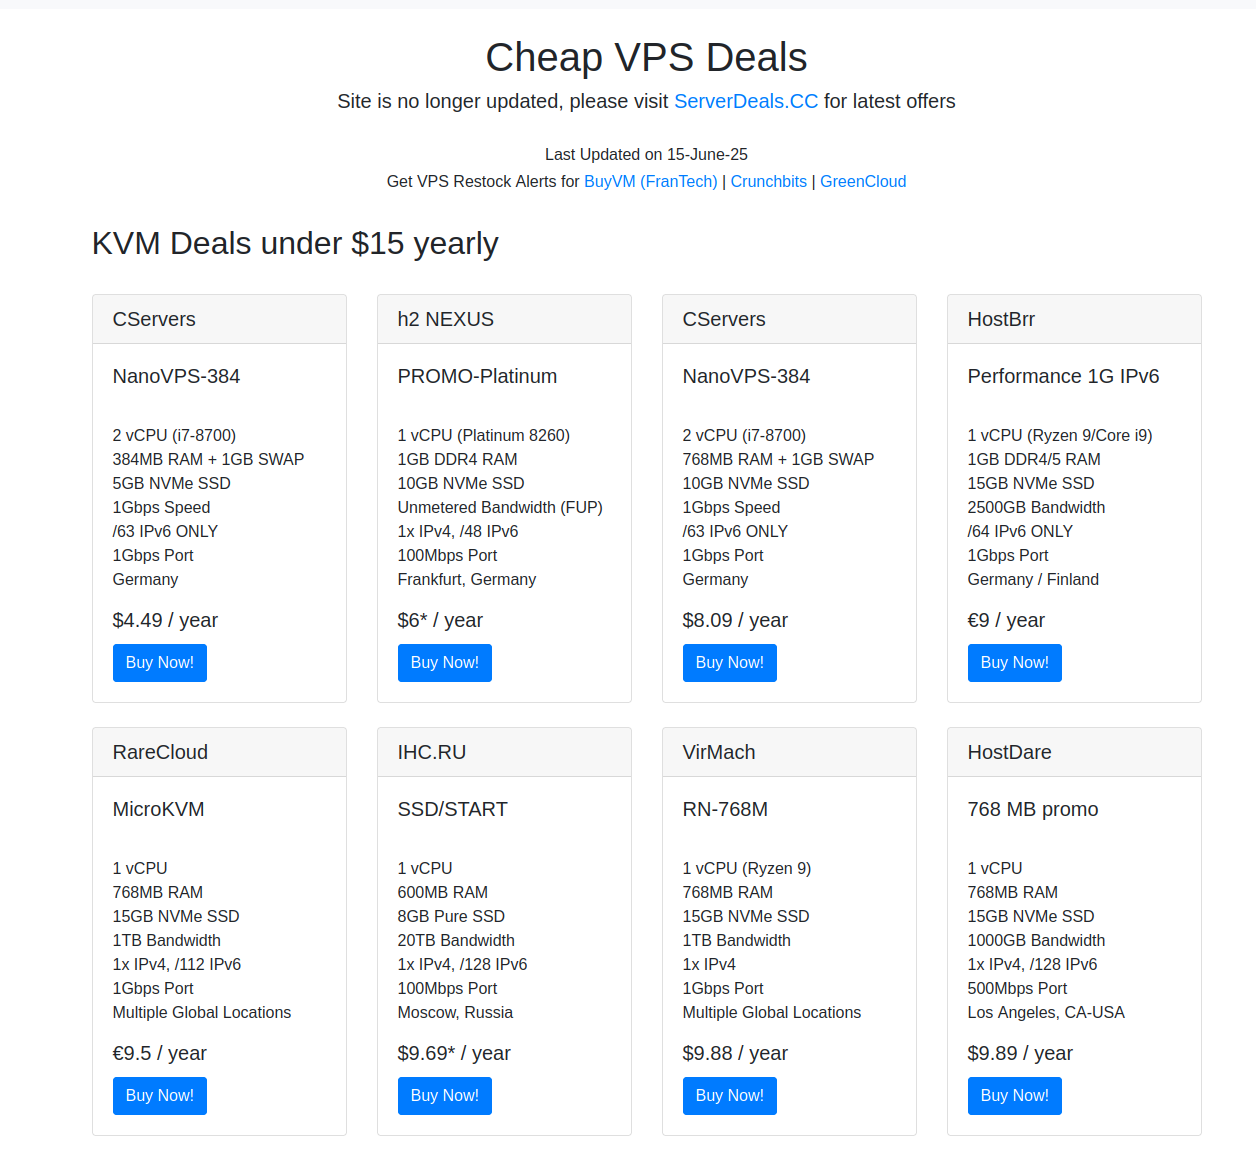
Figure 1: An example of a site that collects such cheap deals.
For a striking example, just take a look at LowEndBox's $1 per month VPS list, the name tells you what to expect. But if you're willing to shop around for more obscure providers and can contort your needs even further (for instance by not requiring an IPv4 address), I've found a company, who'll rent you a VM 5Gb of storage and cca. 400MB of RAM for $4.5 per year, not month, year. I don't think you can go much lower than that.
However, figuring that it's not like I'll be spending fortunes either way, I decided to stick to a well-known and trusted option, netcup. While their cheapest option is closer to 2€ a month, in return you get an unmetered, 100Mbps connection (as long as you use it in good faith), 30Gb of storage space, the option to make a snapshot of your VM for backups, and the assurance that your money is going to a bunch who know their stuff.
Sounds all great… if only it wasn't so unexpectedly convoluted to do business with them.
3. German bureaucracy
As explained earlier, my choice fell on the VPS Pico G11s. At first the process was as one would expect:
I put the VPS in my cart, entered my address and personal data, then clicked through the pages, until I noticed that there is a Netcup newsletter and if you sign up for it, you get a voucher for 5€ off. I figured "Hell yeah, that's almost three months" and signed up. The voucher arrived almost instantly and I happily saw that after entering it, the price of the VPS dropped from 24€ to around 19€. Everything seemed fine, so I pressed on the big, friendly "Order" button…
And was thrown back with an error.
Apparently the VPS I picked was too cheap for the voucher to be applicable for, so I begrudgingly removed it and proceeded with the full price. At the end of the day, 24€ is the cost of two fancy lunches, so I wasn't going to throw everything away just because I couldn't be even more of a cheapskate.
Having corrected my deal and pressed "Order" again, I expected to be redirected to a payment portal. Instead, I was simply informed that an actual human being will verify that my order is legit and that I must wait until that happens. Considering this was very late in the afternoon (way past the usual European working hours), I sighed and resigned myself to wait until the next day or however long it'd take.
In the meantime I received an email, which I found really interesting. It was written in a very serious and legalese way, with long paragraphs of dry text describing my rights and responsibilities, and that, by placing an order, I now have two weeks to refuse entering into the contract with Netcup, after which it becomes binding.
I found this both quite refreshing, a lot of companies hide their nasty details deep into Terms of Uses or other such texts, but not here. Sure, it makes the communication towards their customer less bombastic, but I absolutely didn't mind that.
Then, to my biggest surprise, not ten minutes later my inbox pinged me again: My inspection was successfully finished and I'm ready to log into the portal. So I did just that, expecting to be finally able to pay… only to be hit with a huge interface, where I was ordered to declare my handling of user data according to GDPR.
Sadly, I didn't make a screenshot of this and I'm no longer able to access it, but more or less I was just asked what sort of data I intend to handle. Considering I was making a simple static site, I declared that I'm not handling any personal data and that was that.
At this point, finally, I was able to add my credit card and pay for my server. Five minutes and another two emails later, I received a link to yet another completely different page, which (to my great relief) did indeed allow me to access my machine.
4. Setting up my VPS
The VM came with Debian 13, which is a fine system otherwise, but having had a recent interest in the various BSDs and stumbling on httpd.rocks through Lobste.rs, I decided to ditch it and try my luck with OpenBSD 7.9 instead.
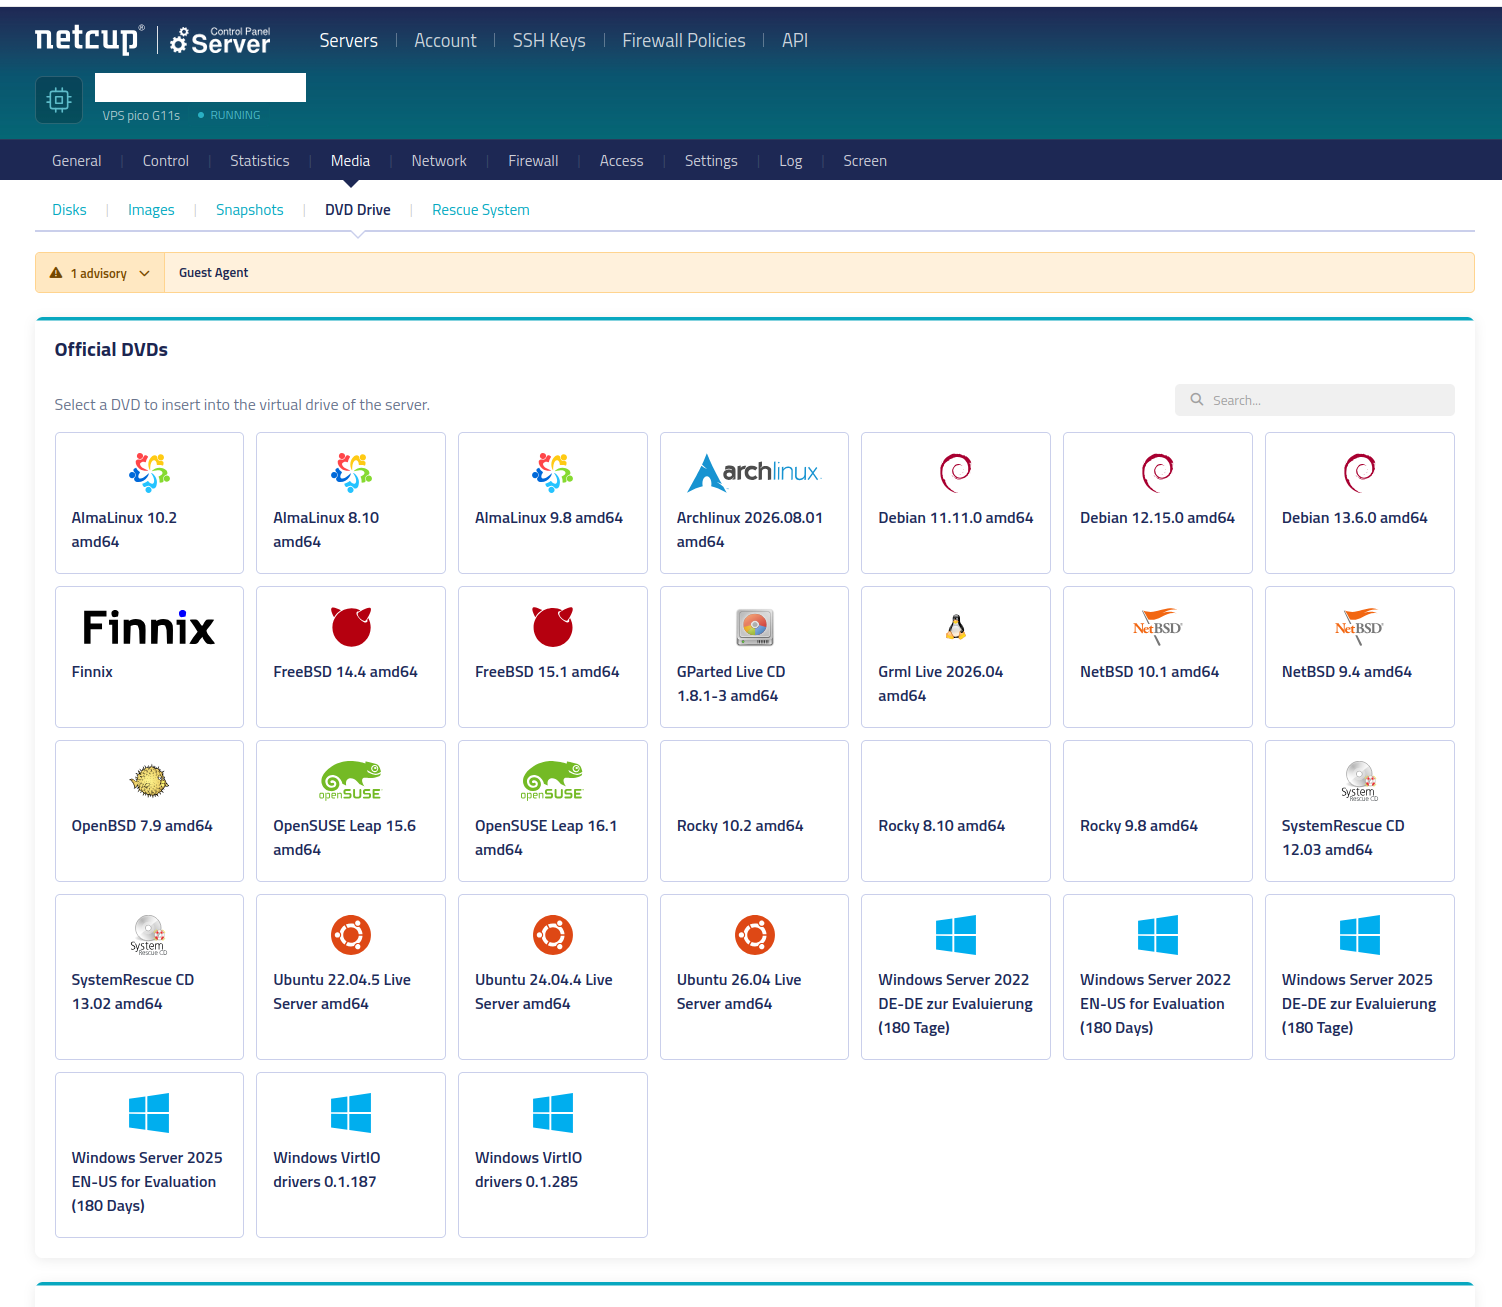
Figure 2: A list of images provided by Netcup. All the BSDs and some nice distro choices… also Windows, I guess, if you're into that…. weirdo.
To my delight netcup provides the newest OpenBSD ISO on their interface. One simply just has to click on it and the VM automatically gets the disk loaded and the boot order changed to boot from it. Power-cycling the VM is a little slow (taking around an entire minute), but I don't expect to do it much, so whatever.
Installing OpenBSD was a breeze. Hands down one of the easiest processes when it comes to putting an OS on your machine. I disabled the X windowing sets and the games set, but kept the rest. Apparently this is a bit of a faux pas, but worst case I'll just reinstall the machine, no biggie.
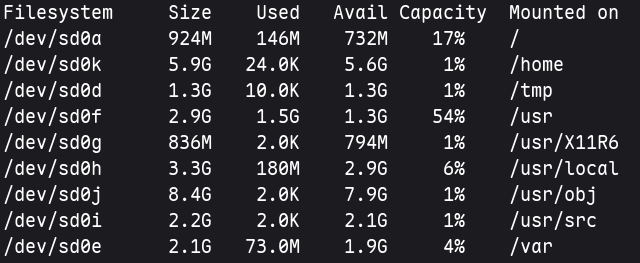
Figure 3: The default filesystem I went with. /var is woefully small.
The only true error I think I made during installation was accepting
the default partitioning scheme, which wastes around 6GB of storage on
/home, which I won't be using anyway, while /var (arguably my most
important folder, as it contains the code for my website and my logs)
ended up being a measly 2GB. It is a bridge that I'll eventually have
to cross, but for now it's fine.
4.1. SSH config
While the Netcup interface does provide a remote desktop, it's not super pleasant to use. Not only is it markedly slow, it is also very particular about when it accepts input, so I quickly decided to look into setting up SSH instead.
I didn't have to look too far, this blogpost was perfect for my needs. It describes both how one can bring a system up to speed and also how to set up SSH in a way that's secure, by disabling dubious ciphers.
I generated a brand new keypair for the VPS, because reusing the same
key for all your projects is a great way to be pwned. And after
quickly logging in with my password and issuing the right
ssh-copy-id call, I disabled password login.
Afterwards I added the a new entry to my ~/.ssh/config file, so I
only need to issue ssh vps and it handles the rest. Much more handy
than needing to do things manually:
AddKeysToAgent yes
ServerAliveInterval 15
ServerAliveCountMax 3

Host vps
  HostName [IPv4 of the VPS]
  User [username]
  IdentityFile ~/.ssh/id_vps
As a final touch, I installed and enabled the rsync package and its
associated daemon, so that I may quickly copy over my websites' files,
whenever I need to update them. It handles SSH very cleanly, I can
just do rsync -avh --delete source vps:destination and it handles
the rest.
With the foundations done, it's time to actually have the machine do its intended job:
4.2. Server and relay config
Frankly, anything instructive I could write here would be a pale and imprecise imitation of httpd.rocks, so if you find my journey at all inspiring, I suggest checking it out.
Instead, I'll just describe my setup matter-of-factly: HTTPS traffic
arrives through relayd (httpd.rocks has a tutorial for this too!),
which handles the TLS handshake and attaches a bunch of headers to the
response to harden its security. I won't copy my config here, because
it's 90% the same as the one in the tutorial.
The only part I changed was commenting out the following header:
match response header append "Content-Security-Policy" value "default-src 'self'; script-src 'self'; object-src 'none';"
I did this, because I rely on Google Fonts and also a couple of my pages have content hotlinked (though I'm working on converting them to locally hosted). While I'm sure I could eventually figure out an exact CSP to let only what I use through, I think it's easier to comment it out for now and re-enable it after cleaning things up.
The same applies to acme-client, which interfaces with Let's Encrypt
to get TLS certificates for my two sites. One thing of note is that if
you're bootstrapping your site from zero, you must enable unencrypted
HTTP traffic, because you simply don't have the certificate yet to do
encryption. But once you've done it once, you can freely redirect all
traffic, because acme-client will happily work with encrypted routes
too.
The httpd config couldn't be simpler:
types { include "/usr/share/misc/mime.types" }
prefork 10

# Nemin.hu

server "nemin.hu" {
    listen on 127.0.0.1 port 8080
    hsts
    gzip-static
    log style forwarded
    root "/htdocs/nemin.hu"
}
server "www.nemin.hu" {
    listen on 127.0.0.1 port 8080
    block return 301 "https://$SERVER_NAME$REQUEST_URI"
}
server "nemin.hu" {
    listen on * port 80
    location "/.well-known/acme-challenge/*" {
        root "/acme"
        request strip 2
    }
    block return 301 "https://$SERVER_NAME$REQUEST_URI"
}

# Oddwords.hu
# ... pretty much a carbon copy of the above, just with the URLs swapped.
The second and third block simply handle redirecting www. and bare
HTTP requests to https://nemin.hu. The first block is the one that
actually serves content. It's also very straightforward, but there are
two calls that I think are worth specifically mentioning:
gzip-staticallows your server to send gzip-encoded HTML instead of uncompressed data. Notably it will not compress files itself, so you have to do that yourself, but the blog post where I learned about this feature also explains how easy it is to create these archives yourselves. (It's literally just callinggzip -kon them.)And if that's still too much manual work, this other post describes a one-liner that allows you to recursively turn everything (but images, which don't benefit from compression) into a
.gzfile:find public/ -type f ! -name '*.png' -exec gzip -9k "{}" \;
The other notable config option is
log style forwarded. One thing you'd notice, if you handled your TLS connection usingrelaydis that if you were to simply log stuff normally, all your IP addresses in the/var/www/logs/access.logfile end up as127.0.0.1.Depending on how much you understand the underlying tech, this is either completely unsurprising or a shock. In my case, it was the latter, but having since read more about it, it's simple:
httpdisn't directly exposed to internet traffic, becauserelaydacts as a so-called proxy server between it and the outside. Therefore, allhttpdever sees is requests coming from and going to localhost, which is not ideal for any sort of analytics or blocking malicious clients.Thankfully this is an old "problem" and it is super easy to fix. As part of our
relaydconfig, we set the following header to the following value:match request header append "X-Forwarded-For" value "$REMOTE_ADDR"
X-Forwarded-For is a de-facto (though not de-jure, see the link) HTTP header, that identifies the legitimate source IP address that the proxy server would otherwise obscure. By setting
log style forwardedinhttpd.conf, we instruct the server to append the contents of this header into the log lines and thus once again are able to differentiate between clients.The only downside of this is that most log analyzers don't understand this exact format, so before you can feed them into these apps, you have to do some pre-processing on them, but this isn't a huge deal in my opinion.
4.3. Be careful with MIMEs
Originally, when I first wrote my config, I didn't include the first line. None of the tutorials I've read mentioned it and the page loaded just fine, so I figured all is well. Except everything wasn't well, because I noticed the pictures on the webpage loading incredibly slowly. Up to 20-30 seconds, despite the fact that due to them being highly-compressed AVIF images, they were rarely over 300KB in size.
A quick googling later I was able to pin down the problem: Without informing the server about the various MIME types, it absolutely struggled to send over anything.
Fixing this is simply adding the following to your config outside any of the server blocks:
types { include "/usr/share/misc/mime.types" }
And here is where I'd like to repeat a very old and very true adage: One should absolutely read the OpenBSD man pages. It is easy to skip over them if one is used to Linux, because quite often the documentation that comes with your packages might be sub-par or simply not detailed enough to help you fix your issues without going on a wild goose chase on the Internet.
However, with OpenBSD, this is different. The manual is super easy to read and understand and even obscure things are often mentioned, including the line seen above:
Types

   Configure the supported media types.  httpd(8) will set the Content-Type
   of the response header based on the file extension listed in the types
   section.  If not specified, httpd(8) will use built-in media types for
   text/css, text/html, text/plain, image/gif, image/png, image/jpeg,
   image/svg+xml, and application/javascript. The types section must
   include one or more lines of the following syntax, enclosed in curly
   braces:

   type/subtype name [name ...]
           Set the media type and subtype to the specified extension name.
           One or more names can be specified per line.  Each line may end
           with an optional semicolon.  Later lines overwrite earlier lines.

   include file
           Include types definitions from an external file, for example
           /usr/share/misc/mime.types.
As you can see, the man page clearly states that AVIF files aren't included by default, so no wonder the server choked on them.
And with this line added, everything loads almost instantly.
5. Findings; or, Bots Love Your Obscure Content!
While I was toying around with loading my site and checking the access logs, I noticed that, beyond my own IP, there were a lot of other clients connecting too. At first I was very happy to see this. Considering I've never had analytics before, I had zero idea how many people actually click on my pages, so seeing the buzzing activity felt very validating…
That is until I actually read the user agents and realized about 40% of these were AI scrapers, another 40% crawler bots, and only 20% were clients I couldn't decisively categorize as either.
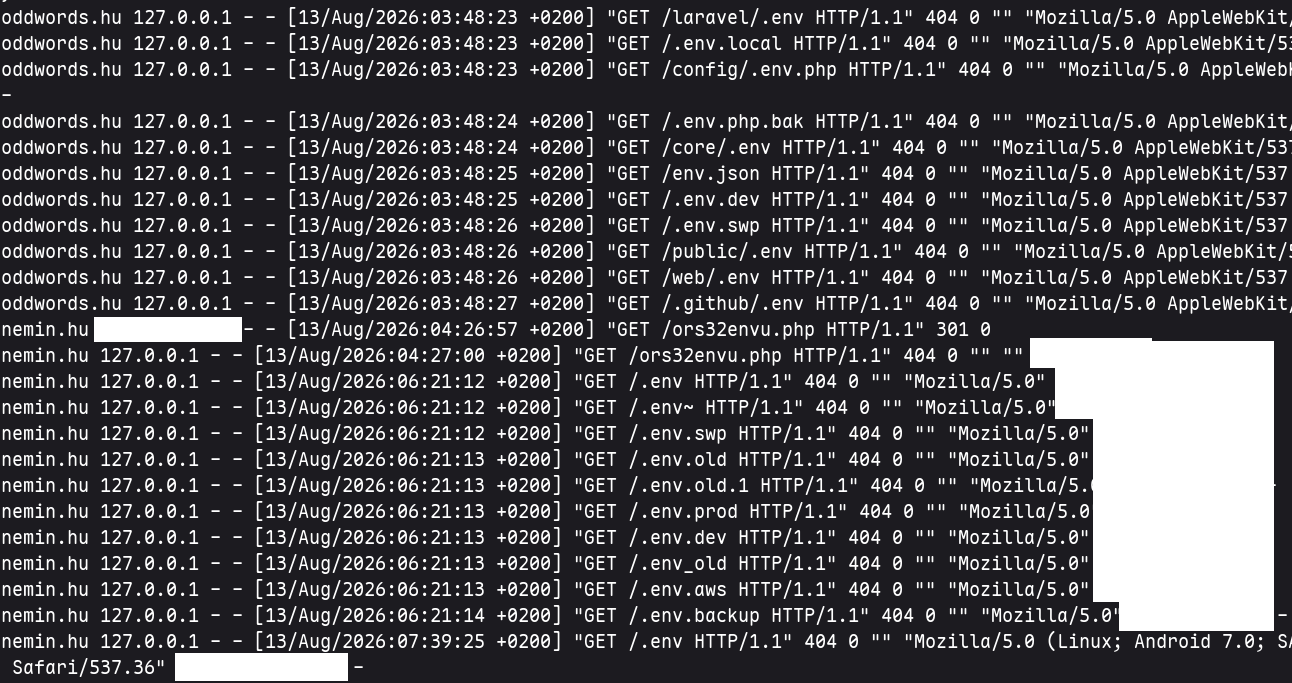
Figure 4: An excerpt from my access logs. All of these were credential scanner/stealer bots.
I must admit this made me a little sad, but then I really shouldn't
have expected anything different. What I found really amusing is that
a lot of these crawlers were trying to crack the site by scanning for
files such as .aws, .env, and wp-*, which they won't find,
because it's a static site.
To stop these futile attempts from hammering my HTTP server, I just
added the following rules into my httpd.conf:
# Drop malicious requests
location "/.aws*" {block drop}
location "/.env*" {block drop}
location "/*.cgi*" {block drop}
location "/cgi-bin/*" {block drop}
location "/*.php*" {block drop}
location "/*wp-*" {block drop}
So if anyone tries to read these (nonexistent) files, their attempt will be silently stopped and shoved out the door.
I also added a simple robots.txt, that disallows all the bigger AI
crawlers from the site, but they don't seem to respect it. For now
I've let things be, but perhaps eventually I'll add their user agents
into the blocklist of my config.
6. Conclusion

Figure 5: I call my main machine luna, so calling a machine that's both very far away and tiny ceres felt very appropriate.
I may be working as a DevOps engineer, but it's a lot different to tweak tiny parts of an already well-established application, with several colleagues to help you and several backups to reach for if something went wrong. So I went into this project with some slight apprehension and with a feeling that any mistakes would be my own and would be my job to solve.
But, all in all, reality turned out to be far less menacing. Migrating to a VPS ended up much quicker and easier than I assumed and I also found it an excellent learning experience, with plenty of further opportunities to branch out to when I feel like it.
So if hosting your own site sounds exciting for you, nowadays it's easier than ever to try and it won't cost you much.
Thanks for reading!